I sat in my driveway, staring at the rearview mirror, trying to give myself a pep talk. I had just walked out of the clinic with a brand-new titanium post in my jaw, and my mouth was a weird cocktail of lingering numbness and a dull, throbbing reminder that I’d just undergone surgery. I thought I was prepared because I’d read the glossy brochures, but as I sat there, it hit me: I didn’t have a clue how to actually live through the next two days without ruining the surgeon’s hard work. If you’re sitting where I was—or about to be—let me tell you that the first 48 hours are the danger zone where you either set yourself up for a breeze or a week of misery. I’m going to show you exactly how to handle the pressure, the food, and the phantom sensations so you can get back to your life without the stress. [image_placeholder]
The Ice Pack Lesson I Learned the Hard Way
I made a huge mistake early on. I thought since I wasn’t in real pain while the local anesthesia was still active, I could go about my business. I even tried to do some light yard work. Bad move. Every time my heart rate went up, I could feel a rhythmic thumping in my gums that screamed for me to stop. You’ve just invested in a solution that will prevent your jawbone from shrinking and keep your facial structure intact, so why rush the healing? The goal for these first two days is simple: stay horizontal and stay cold. I ignored the proven tactics to reduce swelling and paid for it with a face that looked like I’d gone three rounds with a heavyweight boxer. According to the American Association of Oral and Maxillofacial Surgeons (AAOMS), peak swelling usually occurs 48 to 72 hours after surgery, so you must get ahead of the inflammation before the clock starts ticking.
Is all this babying really worth the effort for just one tooth?
I hear this skepticism all the time. People think it’s just one little implant, so they treat it like a simple filling. But here’s the reality: your body is trying to fuse living bone to medical-grade metal. It’s a biological miracle, but it’s a delicate one. If you disturb the surgical site now by being too active or poking at it, you risk the entire project. Have you ever tried to power through a dental recovery only to end up back in the office two days later with a complication? I want to know if you’ve ever faced that specific regret!
Why Your Couch Is Your Best Friend for Two Days
Elevation is the secret weapon nobody talks about in the waiting room. I spent my first night trying to sleep flat on my back like I always do, and I woke up with a pounding headache and a mouth that felt like it was on fire. When I finally propped myself up with three pillows, the relief was instant. Gravity is either your best friend or your worst enemy during recovery. Since you’ve already taken the big step of ensuring your bone density was right for success, don’t let a simple thing like sleeping position ruin the outcome. We’re going to dive into the list of safe foods next, but first, remember that rest isn’t laziness—it’s part of the prescription.
Ditch the Straw and Embrace the Spoon
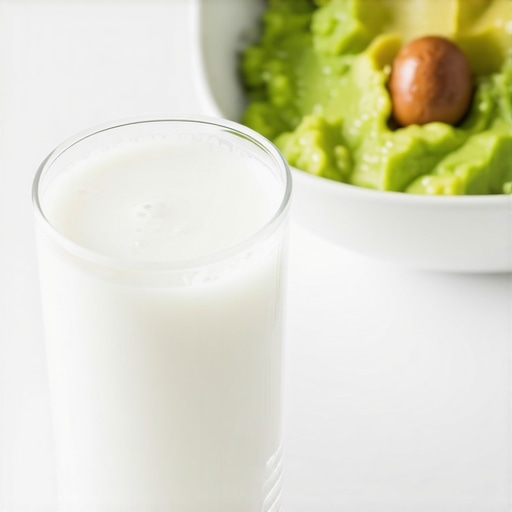
The biggest mistake you can make during the first 24 hours is creating a vacuum in your mouth. When you use a straw, the suction pressure can dislodge the blood clot that is essentially the ‘security guard’ for your new implant. I learned this the hard way when I tried to sip a protein shake on day one; I felt a terrifying tug and spent the next hour hovering over a mirror checking for bleeding. Instead, use a spoon for everything. You want high-calorie, soft options like Greek yogurt or mashed avocado. While we often discuss how long you should really wait to eat after a cleaning, an implant requires a much more deliberate transition. Stick to ‘no-chew’ foods that require zero jaw movement. This isn’t just about comfort—it’s about protecting the cosmetic dentistry innovations you cant miss this year that you’ve just invested in.
Stay Ahead of the Ache Before It Starts
Don’t wait for the pain to show up before you reach for the bottle. Think of pain management like a game of tag where the ‘pain’ is always faster than you. If you wait until you feel a dull ache that wakes you up at night, you’ve already lost the lead. I set an alarm on my phone for every six hours during the first two days, even through the night. Consistency is the only way to keep the inflammatory response at bay. If you find your jaw feels tight or ‘heavy,’ it’s usually a sign that the swelling is peaking. This is normal, but by staying on a strict schedule, you ensure your body remains in a healing state rather than a reactive one.
The Saltwater Rinse Routine That Actually Works
You can’t exactly go in with a vibrating brush and scrub the surgical site immediately. In fact, you should avoid the area entirely for the first few days. However, keeping the rest of your mouth clean is vital for maintaining oral health and getting expert advice for a lifetime of healthy teeth. On the second day, start with gentle saltwater rinses. Don’t swish aggressively like you’re using mouthwash; just tilt your head from side to side and let the water fall out of your mouth into the sink. I remember my first rinse felt incredibly weird—like I was trying to wash a fragile piece of hand-blown glass—but it’s the safest way to prevent infection without disturbing the stitches. For the other teeth, you can use gentle teeth cleaning best practices for sensitive gums to keep plaque away without risking a slip of the hand near the implant. Understanding the ultimate guide to teeth cleaning techniques and benefits will help you realize that hygiene is a supportive pillar of surgery, not an obstacle to it.
Let’s dig deeper into why we often over-complicate things while missing the obvious. Everyone tells you that cosmetic dentistry is about vanity, but in my experience, the best work is actually about restoring function. People assume that getting a new smile is just about picking the whitest shade on the chart, but that’s the fastest way to look like you’re wearing plastic. We often see the subtle bonding error that makes your smile look artificial because patients focus on color rather than the way light translucency works in natural enamel. If your dentist doesn’t talk to you about ‘incisal edges’ and light reflection, you’re just getting a paint job, not a restoration. This is a massive part of the cosmetic dentistry trends that transform your smile this year—it’s about hyper-realism, not perfection.
Stop Using Your Kitchen Pantry as a Dental Lab
I see this ‘oops’ factor constantly: the DIY whitening trap. People think that because a product is ‘natural,’ it’s safe. I’ve had patients come in with permanently sensitive teeth because they read a blog post about the truth about using baking soda as a toothpaste and literally scrubbed their enamel away. You can’t grow that back. If you are struggling with discoloration, especially if it’s not yellow but more of a grayish tint, you might be making the one mistake people make when trying to whiten gray teeth: assuming it’s a surface stain when it’s actually internal. Have you ever tried a ‘natural’ hack only to find your teeth felt more sensitive afterward? Let me know in the comments, because I want to help you avoid that pain!
Why does your gum biotype dictate your veneer success?
This is the advanced nuance most people miss. Not all gums are created equal. In clinical terms, we talk about ‘gingival biotypes’—essentially, whether your gum tissue is thick or thin. According to a study published in the Journal of Clinical Periodontology, patients with a ‘thin-scalloped’ biotype are much more prone to recession and visible margins after a procedure. If your dentist isn’t evaluating your tissue thickness before planning your impact of cosmetic dentistry in 2025, you might find your expensive new smile looking ‘long’ or uneven within just a few years.

Keep the Whole Family on the Same Page
Finally, don’t let your individual recovery distract you from the bigger picture of your household’s health. It’s easy to focus on your own surgical site while the kids’ habits slip. Using family dentistry tips that make oral care effortless and effective ensures that while you’re healing, everyone else is still practicing the preventive care that keeps them out of the surgery chair in the first place. Consistency isn’t just for post-op; it’s the only way to protect the long-term investment you’ve just made in your health.
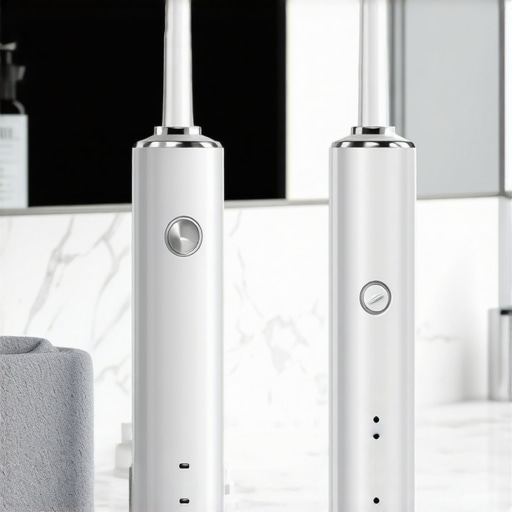
Once the initial healing phase of those first 48 hours is behind you, the real work begins: the long-term protection of your investment. I’ve seen too many people spend thousands on a smile only to treat it with a two-dollar manual toothbrush. If you want these results to last, you need tools that respect the hardware. My personal go-to is a water flosser with a specialized ‘Plaque Seeker’ tip. Unlike string floss, which can snag on the edges of a crown or implant if you aren’t careful, pressurized water gets into the sulcus—the little pocket where the implant meets the gum—without physical friction. This is one of those teeth cleaning secrets to achieve a bright smile in under 30 minutes a day that actually prevents bone loss later on.
Why a Pressure Sensor is Non-Negotiable for New Enamel
If you are using an electric toothbrush, ensure it has a built-in pressure sensor. I personally use the Philips Sonicare ProtectiveClean because it pulses the moment you press too hard. Why does this matter? Because even though your implant is titanium, the gums around it are more vulnerable to recession than natural tooth structures. Excessive scrubbing leads to ‘gray margins’ where the metal starts to peek through. By following preventive tips for long-lasting dental health for families, you ensure that your mechanical habits don’t undo the surgeon’s precision. I predict that within the next five years, we will see ‘smart’ implants with integrated pH sensors that alert your smartphone if local bacteria levels indicate the early stages of peri-implantitis.
How do I maintain my dental restorations over time?
Maintenance is about biofilm management, not just ‘cleaning.’ You need to disrupt the bacteria colony every 12 hours. I recommend a two-step approach: an antimicrobial rinse followed by targeted irrigation. This isn’t just about the implant; it’s about maintaining oral health and getting expert advice for a lifetime of healthy teeth. According to a study published in the International Journal of Implant Dentistry, having at least 2mm of keratinized tissue around the implant is a critical ‘buffer’ against bone loss. If you notice your gums thinning, don’t wait for pain to manifest. Using the top 5 secrets to maintaining perfect oral health as a family can help you spot these subtle changes in the mirror before they become failures.
The Water Flosser Logic That Saves Your Gums
I specifically recommend the Waterpik Aquarius for its ‘Hydro-Pulse’ massage mode. This isn’t just a marketing gimmick; it stimulates blood flow in the gum tissue, which is vital since dental implants have less blood supply than natural teeth. When you understand how regular teeth cleaning can prevent major dental issues, you realize that your home routine is the most important ‘check-up’ you have. My advanced tip for you this week: Swap your standard flosser tip for a tapered orthodontic one. It allows you to trace the gumline of your implant with much higher precision. Start doing this today, and you’ll notice a significant decrease in that ‘tight’ gum feeling within 72 hours.
The Hard Truth About My Titanium Recovery
Looking back on my surgery, I realized that ‘rest’ doesn’t just mean sitting on the couch; it means absolute stillness to prevent that rhythmic throbbing in your gums. I also learned that the mirror can be a liar on day three; peak swelling is a sign your body is working, not that the procedure failed. I had to remind myself that enhancing confidence with cosmetic dentistry is a marathon, not a sprint. Finally, staying hydrated without a straw is difficult but essential for keeping your healing tissues resilient and moist during those first critical hours.
The Gear That Saved My Sanity
I didn’t realize how much the right tools would impact my comfort until I was in the thick of it. First, a high-quality wedge pillow is mandatory to keep your head elevated and reduce nighttime pressure. Second, the Waterpik Aquarius became my best friend once I was cleared for irrigation; its massage mode is vital for stimulating blood flow in the gums. I also recommend checking out official clinical guides so you don’t panic over every minor sensation. Finally, use a simple digital timer app on your phone to strictly manage your saltwater rinses and medication windows so you never have to ‘chase’ the pain.
Reclaiming Your Confidence for Good
Do not let the temporary discomfort of the first 48 hours overshadow the incredible life-long benefit of a permanent tooth. It is time to ignore the oral health myths debunked for 2025 and trust the recovery process. By embracing family dentistry and building a foundation of healthy smiles for all ages, you are investing in a future where you never have to hide your laugh again. This step into cosmetic dentistry is the start of a more confident version of yourself. What is the one thing holding you back from starting your dental implant journey? Let me know in the comments below!