
I still remember the morning after my first major dental surgery. I rolled out of bed, shuffled to the bathroom, and let out a genuine yelp when I saw my reflection. My left cheek had ballooned into something resembling a ripe grapefruit. I had a lunch meeting that afternoon, and I looked like I’d gone three rounds with a heavyweight boxer in a dark alley. It was embarrassing, painful, and honestly, a bit scary at the time. Back then, I didn’t know the first thing about maintaining oral health during a crisis. I made the classic rookie mistake of thinking I could just ‘tough it out’ without a recovery plan. Today, I’m going to pull back the curtain on the exact tactics I use now—and recommend to all my neighbors—to keep inflammation at bay so you can get back to your life without the dreaded chipmunk look.
Why Your Face Blows Up Like a Balloon After Surgery
It’s easy to panic when the swelling starts to peak around day two, but it’s actually just your body’s overenthusiastic way of trying to heal itself. When a dentist performs the safest way to extract a wisdom tooth that is impacted, the surrounding tissue goes into a high-alert defense mode. This causes fluid to rush to the area to protect the surgical site. Early in my dental journey, I made the massive mistake of applying a warm heating pad to my jaw because I thought the warmth would ‘soothe’ the dull ache. I was dead wrong. Heat actually dilates the blood vessels and increases blood flow to the area, which is the last thing you want when your tissues are already gorged with fluid. According to the Mayo Clinic, the absolute golden rule is to stick strictly to cold therapy for the first 24 to 48 hours to constrict those blood vessels and keep the swelling from getting out of hand.
Is all this ice and elevation really worth the hassle?
You might be sitting there wondering if you really need to spend your weekend propped up on a mountain of pillows like royalty just because of a single tooth. The answer is a resounding yes. Believe me, I’ve tried it both ways. Gravity is either your best friend or your worst enemy during these first 72 hours. If you lie flat, blood rushes to your head, and that internal pressure makes the throbbing and swelling significantly worse. I’ve learned the hard way that a 45-degree angle is the ‘sweet spot’ for keeping fluid from pooling in your cheeks. Have you ever woken up the day after a procedure and felt like your face was twice its normal size? It’s a frustrating moment, but once you master the timing of cold packs and proper head elevation, the recovery timeline shrinks dramatically. Once the initial puffiness settles, you’ll also need to know how long you should really wait to eat and what foods won’t knock your progress back a step. We’re going to dive into the specific step-by-step cold-compress rotation that actually works next, moving beyond just ‘holding an ice bag’ to a strategic schedule.
Master the 20-Minute Cold Compress Cycle
To get that ‘grapefruit’ swelling down, you need to treat your face like a high-performance engine that’s overheating. You can’t just leave a fan on it forever; you need a strategic cycle. I recommend the 20-on, 20-off method. For twenty minutes, you keep the cold pack against the surgical site, and then you give your skin a twenty-minute break. This prevents the tissue from becoming too cold—which can actually damage the skin—while still forcing those blood vessels to constrict. I remember one recovery where I tried to shortcut this by using a bag of frozen peas for three hours straight while I binged a documentary. Not only did the peas turn into a soggy, green mess all over my favorite hoodie, but my skin ended up with a mild freezer burn that hurt worse than the actual surgery. Use a gel pack wrapped in a thin towel for even distribution. This disciplined approach is one of the top 5 secrets to maintaining perfect oral health as a family when recovery is the priority. 
Why Soft Foods Save Your Surgical Site
What you put in your mouth is just as important as what you put on your cheek. Think of your surgical site as a freshly paved road; you don’t want a heavy truck driving over it until the cement has dried. Chewing creates muscular tension and increases blood flow to the jaw, which fuels inflammation. Stick to lukewarm or cool liquids for the first day. Once you feel ready for solids, focus on the best foods for kids to eat after having a tooth pulled, such as mashed potatoes, yogurt, or lukewarm scrambled eggs. Avoid anything with a straw! The suction can dislodge the blood clot and lead to a painful dry socket, which is a nightmare you want to avoid at all costs.
The Shift from Cold to Warm After 48 Hours
This is where most people get confused. Cold is for the ’emergency’ phase, but after two days, the swelling usually peaks and stops growing. At this point, you want the fluid to drain away, not stay trapped. This is when you switch to warm, moist heat. The warmth acts like a green light for your lymphatic system, helping it carry away the excess fluid and debris from the area. Just like why we use laser technology for faster gum tissue healing in a clinical setting, heat at home speeds up the biological processes of repair. I usually use a warm washcloth or a heating pad on a very low setting for 15 minutes at a time.
Gentle Saltwater Rinses for Internal Healing
While the outside of your face needs heat, the inside needs a clean environment. Starting 24 hours after surgery, begin gentle saltwater rinses. Don’t swish aggressively like you’re using mouthwash after the ultimate guide to teeth cleaning techniques and benefits; instead, let the water roll around your mouth and then lean over the sink to let it fall out. This keeps the site clean without the risk of mechanical damage. If you’re managing pain simultaneously, look into the best way to manage pain after a deep scaling procedure, as many of those anti-inflammatory tips apply here as well. Keeping the inflammation low internally will always reflect on how quickly the external swelling disappears.
While we’ve focused on the immediate aftermath of surgery, the real danger to your long-term results often comes from the habits you think are helping. I see it all the time: patients who are so dedicated to hygiene that they actually end up sabotaging their own recovery and enamel. There is a common belief that ‘the harder you scrub, the cleaner it gets.’ This is a dangerous myth. In my experience, aggressive hygiene is often worse than no hygiene at all during the healing phase. If you are too rough, you risk the case against aggressive flossing where you literally strip away the delicate interdental tissue that is trying to reattach to your teeth.
Stop Scrubbing Your Gums to Death
The biggest ‘oops’ factor I see with post-operative patients is the urge to use ‘natural’ whitening hacks during recovery. Everyone wants a bright smile to go with their newly aligned teeth, but using abrasive pantry staples is a recipe for disaster. You might have heard that baking soda is a cheap way to brighten your smile, but I strongly advise against the danger of using baking soda to whiten your enamel every day. It is far too abrasive for healing tissues and can create microscopic scratches in your enamel that actually trap more stains in the long run. #IMAGE_PLACE_HOLDER_C#
Can you actually rebuild enamel once it is gone?
This is the question I get from my most analytical patients. The short answer is no—you cannot ‘grow’ new enamel—but you can remineralize what is left. Most people focus entirely on brushing, yet they overlook the chemical environment of their mouth. According to a study published in the Journal of Clinical Dentistry, the Relative Dentin Abrasivity (RDA) of your toothpaste matters significantly more than the frequency of your brushing. If you use a high-RDA paste on a surgical site, you are essentially using sandpaper on a wound. To truly protect your smile, you need to focus on the one nutrient most people lack for healthy tooth enamel: Vitamin K2, which helps direct calcium into your bones and teeth rather than your soft tissues.
The pH Trap That Sabotages Your Morning
Another nuance that even seasoned ‘health enthusiasts’ get wrong is the timing of their morning routine. If you enjoy a glass of lemon water or orange juice to kickstart your day, you are temporarily softening your enamel. If you brush immediately after, you are literally brushing your teeth away. This is why you should never brush your teeth immediately after eating fruit or acidic drinks. You must wait at least 30 to 60 minutes for your saliva to neutralize the pH levels in your mouth. This level of detail is what separates a standard recovery from a professional-grade one. Many of these oral health myths debunked are the difference between needing a follow-up procedure and enjoying a lifetime of health. Have you ever fallen into this trap of brushing right after a healthy snack? Let me know in the comments.
I still remember the morning after my first major dental surgery. I rolled out of bed, shuffled to the bathroom, and let out a genuine yelp when I saw my reflection. My left cheek had ballooned into something resembling a ripe grapefruit. I had a lunch meeting that afternoon, and I looked like I’d gone three rounds with a heavyweight boxer in a dark alley. It was embarrassing, painful, and honestly, a bit scary at the time. Back then, I didn’t know the first thing about maintaining oral health during a crisis. I made the classic rookie mistake of thinking I could just ‘tough it out’ without a recovery plan. Today, I’m going to pull back the curtain on the exact tactics I use now—and recommend to all my neighbors—to keep inflammation at bay so you can get back to your life without the dreaded chipmunk look.
Why Your Face Blows Up Like a Balloon After Surgery
It’s easy to panic when the swelling starts to peak around day two, but it’s actually just your body’s overenthusiastic way of trying to heal itself. When a dentist performs the safest way to extract a wisdom tooth that is impacted, the surrounding tissue goes into a high-alert defense mode. This causes fluid to rush to the area to protect the surgical site. Early in my dental journey, I made the massive mistake of applying a warm heating pad to my jaw because I thought the warmth would ‘soothe’ the dull ache. I was dead wrong. Heat actually dilates the blood vessels and increases blood flow to the area, which is the last thing you want when your tissues are already gorged with fluid. According to the Mayo Clinic, the absolute golden rule is to stick strictly to cold therapy for the first 24 to 48 hours to constrict those blood vessels and keep the swelling from getting out of hand.
Is all this ice and elevation really worth the hassle?
You might be sitting there wondering if you really need to spend your weekend propped up on a mountain of pillows like royalty just because of a single tooth. The answer is a resounding yes. Believe me, I’ve tried it both ways. Gravity is either your best friend or your worst enemy during these first 72 hours. If you lie flat, blood rushes to your head, and that internal pressure makes the throbbing and swelling significantly worse. I’ve learned the hard way that a 45-degree angle is the ‘sweet spot’ for keeping fluid from pooling in your cheeks. Have you ever woken up the day after a procedure and felt like your face was twice its normal size? It’s a frustrating moment, but once you master the timing of cold packs and proper head elevation, the recovery timeline shrinks dramatically. Once the initial puffiness settles, you’ll also need to know how long you should really wait to eat and what foods won’t knock your progress back a step. We’re going to dive into the specific step-by-step cold-compress rotation that actually works next, moving beyond just ‘holding an ice bag’ to a strategic schedule.
Master the 20-Minute Cold Compress Cycle
To get that ‘grapefruit’ swelling down, you need to treat your face like a high-performance engine that’s overheating. You can’t just leave a fan on it forever; you need a strategic cycle. I recommend the 20-on, 20-off method. For twenty minutes, you keep the cold pack against the surgical site, and then you give your skin a twenty-minute break. This prevents the tissue from becoming too cold—which can actually damage the skin—while still forcing those blood vessels to constrict. I remember one recovery where I tried to shortcut this by using a bag of frozen peas for three hours straight while I binged a documentary. Not only did the peas turn into a soggy, green mess all over my favorite hoodie, but my skin ended up with a mild freezer burn that hurt worse than the actual surgery. Use a gel pack wrapped in a thin towel for even distribution. This disciplined approach is one of the top 5 secrets to maintaining perfect oral health as a family when recovery is the priority.
Why Soft Foods Save Your Surgical Site
What you put in your mouth is just as important as what you put on your cheek. Think of your surgical site as a freshly paved road; you don’t want a heavy truck driving over it until the cement has dried. Chewing creates muscular tension and increases blood flow to the jaw, which fuels inflammation. Stick to lukewarm or cool liquids for the first day. Once you feel ready for solids, focus on the best foods for kids to eat after having a tooth pulled, such as mashed potatoes, yogurt, or lukewarm scrambled eggs. Avoid anything with a straw! The suction can dislodge the blood clot and lead to a painful dry socket, which is a nightmare you want to avoid at all costs.
The Shift from Cold to Warm After 48 Hours
This is where most people get confused. Cold is for the ’emergency’ phase, but after two days, the swelling usually peaks and stops growing. At this point, you want the fluid to drain away, not stay trapped. This is when you switch to warm, moist heat. The warmth acts like a green light for your lymphatic system, helping it carry away the excess fluid and debris from the area. Just like why we use laser technology for faster gum tissue healing in a clinical setting, heat at home speeds up the biological processes of repair. I usually use a warm washcloth or a heating pad on a very low setting for 15 minutes at a time.
Gentle Saltwater Rinses for Internal Healing
While the outside of your face needs heat, the inside needs a clean environment. Starting 24 hours after surgery, begin gentle saltwater rinses. Don’t swish aggressively like you’re using mouthwash after the ultimate guide to teeth cleaning techniques and benefits; instead, let the water roll around your mouth and then lean over the sink to let it fall out. This keeps the site clean without the risk of mechanical damage. If you’re managing pain simultaneously, look into the best way to manage pain after a deep scaling procedure, as many of those anti-inflammatory tips apply here as well. Keeping the inflammation low internally will always reflect on how quickly the external swelling disappears.
While we’ve focused on the immediate aftermath of surgery, the real danger to your long-term results often comes from the habits you think are helping. I see it all the time: patients who are so dedicated to hygiene that they actually end up sabotaging their own recovery and enamel. There is a common belief that ‘the harder you scrub, the cleaner it gets.’ This is a dangerous myth. In my experience, aggressive hygiene is often worse than no hygiene at all during the healing phase. If you are too rough, you risk the case against aggressive flossing where you literally strip away the delicate interdental tissue that is trying to reattach to your teeth.
Stop Scrubbing Your Gums to Death
The biggest ‘oops’ factor I see with post-operative patients is the urge to use ‘natural’ whitening hacks during recovery. Everyone wants a bright smile to go with their newly aligned teeth, but using abrasive pantry staples is a recipe for disaster. You might have heard that baking soda is a cheap way to brighten your smile, but I strongly advise against the danger of using baking soda to whiten your enamel every day. It is far too abrasive for healing tissues and can create microscopic scratches in your enamel that actually trap more stains in the long run. #IMAGE_PLACE_HOLDER_C#
Can you actually rebuild enamel once it is gone?
This is the question I get from my most analytical patients. The short answer is no—you cannot ‘grow’ new enamel—but you can remineralize what is left. Most people focus entirely on brushing, yet they overlook the chemical environment of their mouth. According to a study published in the Journal of Clinical Dentistry, the Relative Dentin Abrasivity (RDA) of your toothpaste matters significantly more than the frequency of your brushing. If you use a high-RDA paste on a surgical site, you are essentially using sandpaper on a wound. To truly protect your smile, you need to focus on the one nutrient most people lack for healthy tooth enamel: Vitamin K2, which helps direct calcium into your bones and teeth rather than your soft tissues.
The pH Trap That Sabotages Your Morning
Another nuance that even seasoned ‘health enthusiasts’ get wrong is the timing of their morning routine. If you enjoy a glass of lemon water or orange juice to kickstart your day, you are temporarily softening your enamel. If you brush immediately after, you are literally brushing your teeth away. This is why you should never brush your teeth immediately after eating fruit or acidic drinks. You must wait at least 30 to 60 minutes for your saliva to neutralize the pH levels in your mouth. This level of detail is what separates a standard recovery from a professional-grade one. Many of these oral health myths debunked are the difference between needing a follow-up procedure and enjoying a lifetime of health. Have you ever fallen into this trap of brushing right after a healthy snack? Let me know in the comments.
Invest in the Right Countertop Arsenal
To maintain long-term results, you have to stop treating your bathroom like a storage closet and start treating it like a specialized clinic. I’ve tried every gadget under the sun, but I always come back to a high-quality water flosser for deep maintenance. If you’ve just invested in a procedure, you need to ensure debris never has a chance to settle. Clinical data from the Clinicians Report Foundation suggests that sonic vibration technology provides a statistically significant advantage in removing biofilm compared to manual brushing, particularly in posterior areas where surgery often takes place. I personally use a sonic brush with a pressure sensor because I know I have a tendency to press too hard when I’m in a rush. This is one of those family dentistry tips that make oral care effortless and effective for every age group in your house. 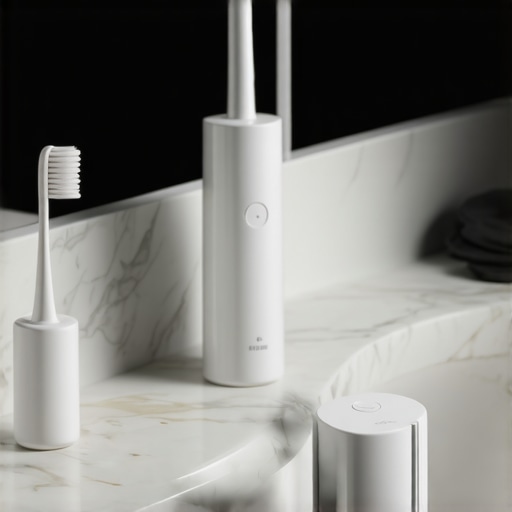
How do I maintain my smile’s integrity over time?
Consistency is your only real insurance policy. Beyond the fancy tools, you need to understand how regular teeth cleaning can prevent major dental issues that could undo thousands of dollars in cosmetic work. I tell my patients that the ‘six-month rule’ isn’t a suggestion; it’s the biological timeline for plaque to calcify into tartar that you simply cannot remove at home. If you miss that window, you are essentially letting a slow-motion wrecking ball swing at your gum line. Dr. Gordon Christensen, a leading voice in clinical research, has often noted that the longevity of bonded restorations depends more on the patient’s daily home-care equipment than the actual brand of ceramic used. This means your choices at the pharmacy matter just as much as my choices in the chair.
The High-Tech Future of Dental Visits
Looking ahead, the era of ‘goopy impressions’ and manual guesswork is fading fast. We are moving toward a fully digital workflow where why we use digital scans instead of goopy impression trays becomes the standard, allowing for sub-millimeter precision in how your bite is balanced. This precision is critical for the cosmetic dentistry innovations you cant miss this year, including ultra-thin veneers that require less tooth preparation. I predict that within five years, AI-integrated software will monitor your gum health from home through smartphone attachments. For now, the most advanced move you can make is to master your current tools. I want you to try this one tip tonight: swap your traditional floss for a high-quality water flosser and pay close attention to the surgical site—you’ll be amazed at how much faster the inflammation resolves when the area is truly flushed clean.
The Hardest Lessons I Learned the Long Way
Looking back at my grapefruit-sized cheek, I realized that my biggest mistake wasn’t just using heat too early; it was underestimating the power of biology. I used to think of maintaining oral health as a reactive chore rather than a proactive investment. One major lightbulb moment was realizing that dental anxiety actually amplifies physical swelling by spiking your blood pressure. When you relax into the recovery process, your body can focus on healing rather than defense. I also learned that consistency in the small things—like that 45-degree sleeping angle—is more effective than any single ‘miracle’ cure. Most importantly, I realized that your mouth is an ecosystem; what you do on the outside of your face with cold packs must be matched by what you do inside with proper nutrition and pH balance.
What I Keep in My Medicine Cabinet Now
To ensure my family never repeats my early mistakes, I have built a specific toolkit for dental resilience. I never travel without a portable water flosser anymore; it is the only way to safely flush a surgical site without the risks of manual flossing. I also highly recommend implementing family dentistry tips that make oral care effortless and effective, such as switching to a sonic toothbrush with a built-in pressure sensor. My third essential is a high-quality Vitamin K2 supplement, which acts as a ‘traffic cop’ for calcium, ensuring it strengthens your enamel rather than settling in your soft tissues. I trust these tools because they move beyond surface-level cleaning to support the actual architecture of your teeth and gums.
Your Path to a Pain-Free Smile
You don’t have to fear the ‘chipmunk look’ or the recovery process anymore. By being proactive and understanding how regular teeth cleaning can prevent major dental issues, you are taking full control of your health journey. The transition from surgery to a bright, healthy smile is paved with these small, intentional choices. You have the knowledge and the tools—now it’s just about putting them into practice for your next appointment. #IMAGE_PLACEHOLDER_E#
Have you ever tried the 20-minute ice cycle, or did you find another trick that worked better for your swelling? Let me know in the comments below!